All Hollow Knight Silksong bosses listed
Including the Silksong boss locations map.


Bosses are everywhere in Hollow Knight: Silksong! While some are optional, a good number of them are mandatory if you want to complete the game. (Though that doesn't mean you can't avoid a few…)
Knowing the exact boss locations is important in Silksong as it will help you prepare for upcoming fights; be it by changing your Tool setup or finding the nearest Bench to sit on. Due to this, we've included a boss locations map down below.
So read on to find our Hollow Knight: Silksong all bosses list to walk you through the Silksong boss order.
On this page:
If you'd like more to learn in Pharloom, visit our Hollow Knight: Silksong walkthrough.
All Silksong bosses listed
Below you'll find our in-progress Hollow Knight: Silksong bosses, along with details on whether each boss is mandatory or optional. After this table, we've included a map of bosses locations and tips on how to defeat a number of bosses.
| Boss | Location | Mandatory or Optional |
|---|---|---|
| Moss Mother | Moss Grotto | Mandatory (Act One) |
| Bell Beast | The Marrow | Optional (Act One) |
| Lace | Deep Docks | Optional (Act One) |
| Fourth Chorus | Far Fields | Mandatory (Act One) |
| Savage Beastfly | Hunter's Marsh | Optional (Act One) |
| Sister Splinter | Shellwood | Mandatory (Act One) |
| Skull Tyrant (1) | The Marrow | Optional (Act One) |
| Skull Tyrant (2) | Moss Grotto | Optional Rematch (Act One) |
| Moorwing | Greymoor | Optional (Act One) |
| Widow | Shellwood | Mandatory (Act One) |
| Moss Mother (x2) | Weavenest Atla | Optional (Act One) |
| Savage Beastfly (x2) | Far Fields | Optional (Act One) |
| Great Conchflies | Blasted Steps | Optional (Act One) |
| The Last Judge | Blasted Steps | Mandatory (Act One) |
| Phantom | Exhaust Organ Requires completing Bilewater Mist Puzzle |
Secret Optional (Act One) |
| Cogwork Dancers | Cogwork Core | Mandatory (Act Two) |
| Trobbio | The Stage | Optional (Act Two) |
| Garmond and Zaza | Songclave | Optional (Act Two) |
| Forebrothers Signis and Gron | Deep Docks | Mandatory (Act Two) |
| Unravelled | Whiteward | Secret Optional (Act Two) |
| Disgraced Chef Lugoli | Sinner's Road | Optional (Act Two) |
| Father of the Flame | Wisp Thicket (far west) | Optional (Act Two) |
| Groal the Great | Bilewater | Optional (Act Two) |
| Voltvyrm | Voltnest (Sands of Karak) | Optional (Act Two) |
| Raging Conchfly | Coral Tower | Optional (Act Two) |
| First Sinner | The Slab | Secret Optional (Act Two) |
| Broodmother | The Slab | Optional (Act Two) |
| Second Sentinel | High Halls (east of The Forum) | Optional (Act Two) |
| Shakra | Greymoor | Optional (Act Two) |
| Lace | The Cradle | Mandatory (Act Two) |
| Grand Mother Silk | The Cradle | Mandatory (Act Two) |
| Bell Eater | Choral Chambers | Optional (Act Three) |
| Moss Mother | Moss Grotto | Optional (Act Three) |
| Lost Garmond | Blasted Steps | Optional (Act Three) |
| Crawfather | Greymoor | Optional (Act Three) |
| Plasmified Zango | Wormways | Optional (Act Three) |
| Watcher at the Edge | Sands of Karak | Optional (Act Three) |
| Palestag | Verdania | Optional (Act Three) |
| Clover Dancers | Verdania | Optional (Act Three) |
| Gurr the Outcast | Far Fields (east) | Optional (Act Three) |
| Tormented Trobbio | Whispering Vaults | Optional (Act Three) |
| Pinstress | Mount Fay | Optional (Act Three) |
| Shrine Guardian Seth | Shellwood | Mandatory (Act Three) |
| Nyleth | Grand Gate (southwest) | Mandatory (Act Three) |
| Skarrsinger Karmelita | Far Fields | Mandatory (Act Three) |
| Crust King Khann | Sands of Karak | Mandatory (Act Three) |
| Summoned Saviour | Moss Grotto | Mandatory (Act Three) |
| Lost Lace | The Abyss | Mandatory (Act Three) |
Silksong bosses locations map
Here's a quick overview map of all the boss locations in Silksong. Thank you to Map Genie for both creating this map and letting us use it.
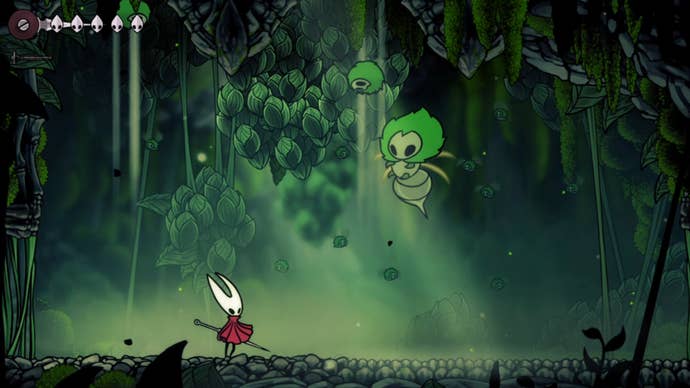
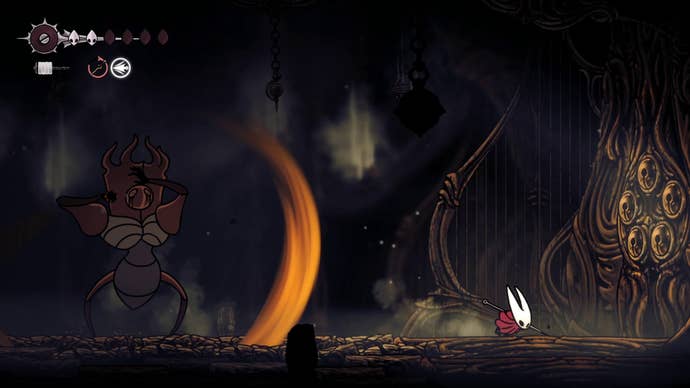
Moss Mother
Location: Moss Grotto (in the Ruined Chapel).
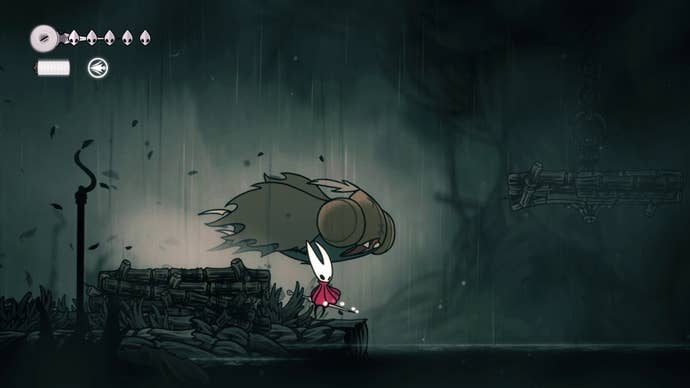
Moss Mother is very much Silksong's tutorial boss and serves this purpose well. Her fight demonstrates the importance of dodging attacks, especially when it comes to jumping over your foe, and getting in one singular hit before retreating. Her primary attack is flying down towards Hornet with her stringer outstretched. She will hover in the air afterwards, giving you the chance to hit her. Just don't get hit by the stringer!
As the fight progresses, Moss Mother will cause rocks to fall from the ceiling and summon Moss Grubs. Keep an eye out for dust falling from the ceiling - this will tell you when and where these extra obstacles will appear.
Check out our Moss Grotto walkthrough for more details on defeating the Moss Mother.
Bell Beast
Location: The Marrow (north-east of the entrance). Starting the battle requires the Silkspear ability.
The Bell Beast begins the fight with two primary attacks - dashing forward before swiping its tail and jumping over Hornet. As the fight progresses, it also emerges from the ground and tosses two bells at you. Thankfully, these can be easily dodged by putting some distance between yourself and the Bell Beast. Finally, towards the end of the fight, it will cause bells to fall from the ceiling.
When it comes to defeating the Bell Beast, the best time to strike is when it's landing from a jump. It will be vulnerable during these few vital seconds and perfect for hitting. You can also try pogoing it during its dashing attack. Just try to avoid falling down onto the beast after a successful hit.
Check out our Bell Beast boss strategy for more help defeating this creature and our fast travel guide for details on the mechanic you'll unlock after being victorious.
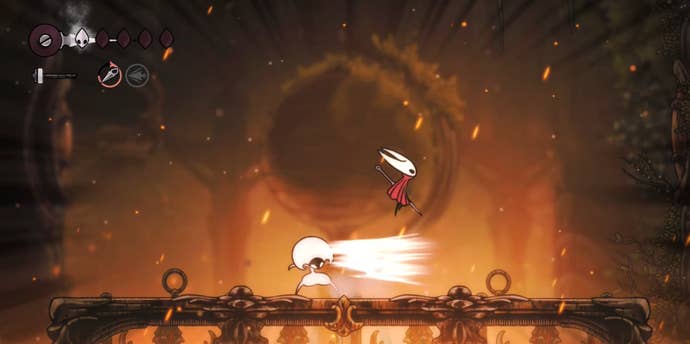
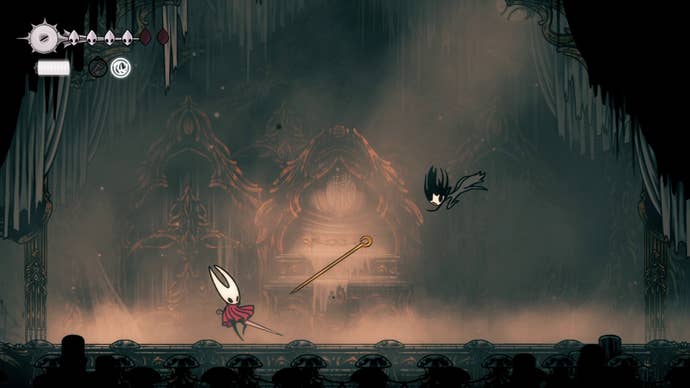
Lace (Deep Docks)
Location: Deep Docks (before entrance to Far Fields). Starting the battle requires the Swift Step ability.
Lace is a recurring boss in Silksong and her fight in Deep Docks marks a step up in the game's difficulty. She has a range of different attacks, which I go over in full within the Lace (Deep Docks) boss strategy guide.
Keeping things brief here, it's important to note that her primary attacks are a forward sword thrust and dive attack very similar to Hornet's pogoing attack. When you reach Phase Two, she will start using an attack that causes a circle to appear. Always ensure you're outside of this circle and the attack will be avoided!
The key to defeating Lace is dodging as many of her attacks as possible, then, once she's completed one, rushing in and getting one hit in. Make sure it's one hit too as Lace can block your attacks and, if she does so too many times, she will unleash a powerful flurry attack! You focus on using either pogoing attack or carefully manoeuvring for your single hit.
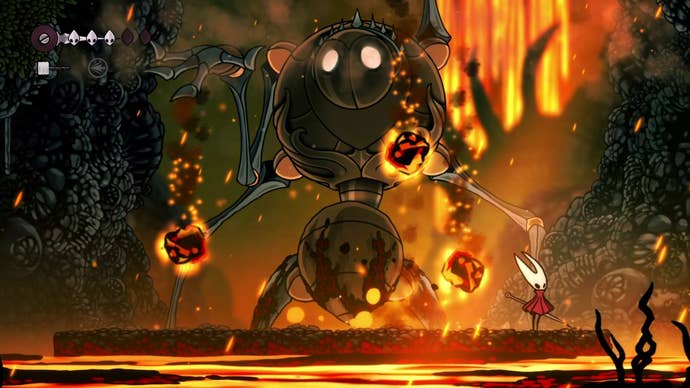
Fourth Chorus
Location: Far Fields (before the area containing the Streamstress). Requires the Drifter's Cloak to start the battle.
Defeating the Fourth Chorus involves dodging its various attacks and ensuring you don't accidentally fall into the lava. Sounds simple right? Well the Fourth Chorus will cause certain parts of the platform Hornet is standing on to vanish throughout the fight. They will thankfully remain, but be prepared to do a lot of jumping.
The first is swiping horizontally with either of its lower two arms and the second is slapping downwards with either of its upper two arms. Luckily, the direction of these attacks is easy to figure out. The Fourth Chorus starts using its third attack after you've stunned it for the first time. During this attack, this large bug will cause rocks to fall from the sky.
To defeat the Fourth Chorus, you need to hit its head. For more tips, including a way to end the boss battle slightly early, check out our Fourth Chorus boss strategy.
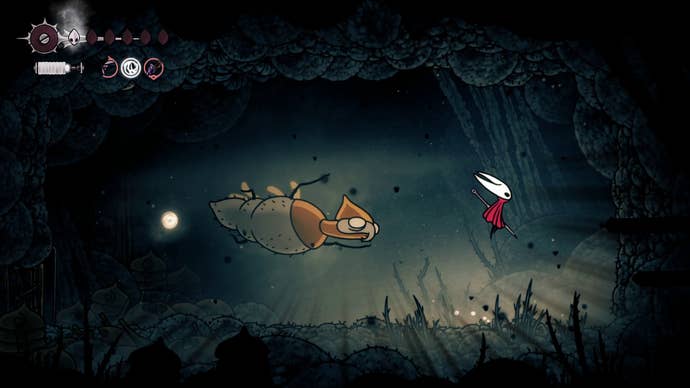
Moorwing
Location: Greymoor (south-western corner, near entrance to Bellhart).
Moorwing is a flying boss and, like many flying bosses in gaming history, this means trouble. It has a dive attack where he'll fly right at Hornet and, even when jumping over Moorwing, you may still get hit. Though sometimes Moorwing will fly into a platform and stun itself. There's also a disc attack and slice attack - both of which can take two masks worth damage.
Defeating Moorwing involves a heavy use of Silkspear since range attacks are safer attacks. You can also try luring Moorwing into hitting the platforms and stunning itself. Though always try to avoid being directly beneath Moorwing as this could lead to an early death.
Don't worry if you're having trouble defeating Moorwing. Not only is there a cheese method for this fight, but you actually avoid it all together. Learn about both in our Moorwing boss strategy guide.
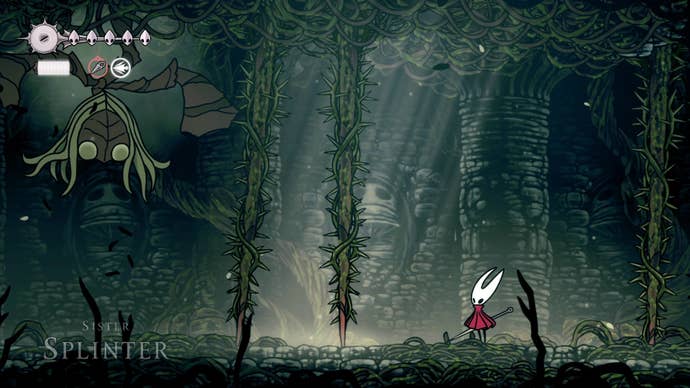
Sister Splinter
Location: Shellwood (near central elevator).
Sister Splinter may be hanging from the ceiling, but that doesn't mean she can't cause Hornet a lot of pain. She has the ability to slam down onto the ground and create thorns which will reduce the amount of free space you have. While these thorns can be destroyed by yourself or Sister Splinter, you need to be careful when dealing with them.
She starts using her most annoying attack, however, after you've stunned her for the first time. It's at this point she'll start summoning Splinterbarks and these enemy bugs will spawn until the fight is over. It's at this point where you'll have to manage defeating the Splinterbarks alongside Sister Splinter. Let yourself get overrun and the battle will be over!
Check out our Sister Splinter boss strategy guide for more in-depth knowledge on how to defeat this Silksong boss.
Widow
Location: Bellhart (northern section).
The Widow's difficulty comes from her attack speed - fast - rather than her actual attacks - simple. This means victory comes in part from learning how to fight at her speed to ensure you can one) dodge her attacks and two) get some of your own attacks in. It's also important to note that she does change some of her attack tells in Phase Two of the fight, so make sure you're paying close attention! You'll also be dodging bells again during this fight, so I hope you like doing that.
The real problem with the Widow fight, however, is that she tries to trick you. The victory sound will play and you'll drop your guard, thinking all's well and safe. But - surprise! You've just entered Phase Two and the Widow is definitely out for Hornet's blood now. Just keep dodging and getting those attacks in until you've actually defeated her.
For more help, visit our Widow boss strategy!
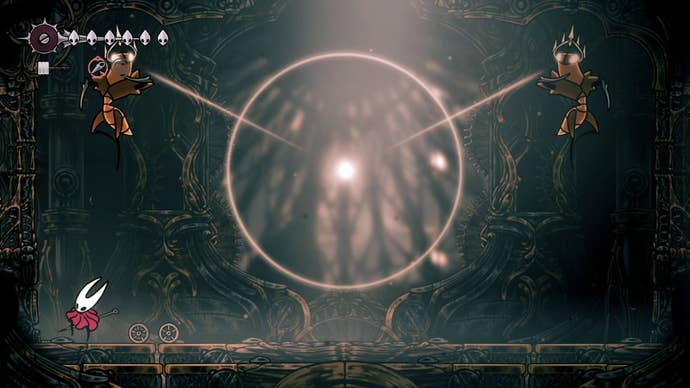
Great Conchflies
Location: Blasted Steps (in area east of the Pinstress' house).
Even though the Great Conchflies are one of the optional bosses in Silksong, they still pose quite the challenge. As the name suggests, you'll be facing two Great Conchflies during this battle so you need to keep an eye on both. The good news is you only need to kill one Great Conchfly to end the battle! Though, you do need to watch the ceiling as the flies will causes rocks to fall throughout the fight.
In fact, you should keep an eye on the floor as well! If smoke is rising from the floor, then a Great Conchfly is about to appear from the ground in this spot. Just try your best to focus on one Great Conchfly, so you can hopefully end this early.
Check out our Great Conchflies boss strategy for more assistance.
The Last Judge
Location: Blasted Steps (requires completing the Grand Gate quest).
The Last Judge offers the hardest fight in Act 1, which makes sense since he is this act's final boss. I highly recommend collecting enough Mask Shards to increase Hornet's health and upgrading the needle before attempting to battle The Last Judge. (Or you'll just be making the fight harder for yourself.)
What makes The Last Judge truly tricky is that his entire attack set changes when you enter the second Phase of the fight. This means you'll essentially need two unique attack plans for one character! Especially since he clearly has a working lighter in Phase Two. (It's never good when a boss brings fire into the equation.) Due to this, The Last Judge is another boss you'll want to consider hitting once before getting well out of the way.
For more details about his full attack set and tips on how to defeat him, visit our The Last Judge boss strategy.
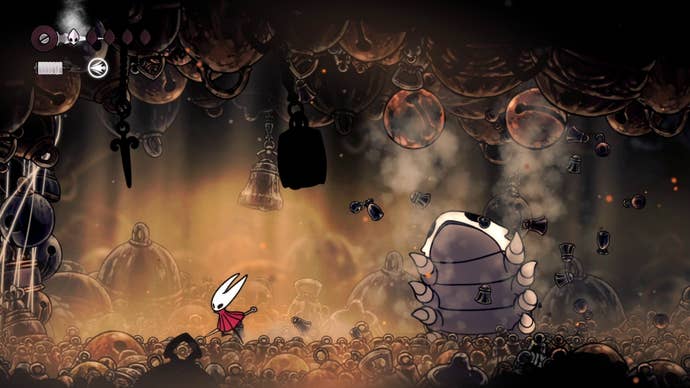
Phantom
Location: Exhaust Organ.
Phantom is one of the optional bosses in Act One and offers an alternative way to enter Act Two. It's actually a slightly easier boss compared to The Last Judge, but reaching it can be quite tricky as you have to navigate both Sinner's Road and The Mist.
When you do reach the Phantom, make sure you're not in the middle nor the left-hand side of the battle. This is because Phantom begins the battle by blasting steam in these two areas and this can quickly knock Hornet's health down. After this you might find Phantom quite similar to Lace as it will attack use using its needle from both the air and on the ground. It also has the ability to parry your attacks.
It's also a really good idea to bring a range Tool - be it the Straight Pin or Sting Shard - for this fight. If you'd like to learn more, check out our Phantom boss strategy.
Cogwork Dancers
Location: Cogwork Core.
The first thing you need to know about the Cogwork Dancers is that touching them will take two Masks worth of damage. Yup, that's right - one misstep can seriously damage your health. Quite a fitting for this fight.
When fighting the Cogwork Dancers, you should keep an eye out for either a stream or circle of light. These are the telegraphs for their coming attack. If a stream of light appears, then need to make sure you're not standing in the direction its point. (The Drifter's Cloak may come in handy.) While, for the circle of light, you should make sure you're not stuck in its circumference.
It's a good idea to focus your all of your attacks on one Dancer first and, if you're looking for more help, check out our Cogwork Dancers boss strategy.
The Unravelled
Location: Whiteward.
The Unravelled is a secret boss hidden deep in Whiteward that you'll definitely want to go and seek out, as the reward he drops - a Silk Heart - is one of three found throughout all of Pharloom. On top of that, he's not the most troubling boss you'll have battled it out with so far, but the fight against him is a very long one.
Consisting of three phases, with waves of enemies inbetween each of them, you'll soon see why the Unravelled has just two, relatively easy to avoid attacks. That's because he has Dreg Husk enemies and telekinetic spears doing most of the work for him as he charges from side to side in the arena.
Unless you have the patience of a saint, bringing Tools into this fight is a must if you wish to get the fight over with quickly. For more help, take a look at our Unravelled boss strategy.
Broodmother
Location: The Slab.
The Broodmother, also known as the Wailing Mother, is a boss you'll eventually fight in The Slab after having wrapped up most of Songclave's Wishes (as well as any donation Wishes in Bellhart and Bone Bottom). Your hard work in Songclave is ultimately rewarded with a horrible boss that begins with a gauntlet of flying enemies, and after that, you'll be facing the Broodmother alongside the pesky, explosive Freshflies that she continually spawns.
This fight, honestly, is not that fun at all. Dodging the Broodmother's slimy projectiles - which render Hornet immobile if you come into contact with them - while dodging Freshflies who explode upon being hit, while also avoiding the Broodmother herself... is a challenge. All that for a Heavy Rosary Necklace? It's not great... but it's got to be done, for Songclave's sake!
If you're looking for any help with the fight against the Wailing Mother, here's our Broodmother boss strategy.
More to come…
Hope this has helped you deal with the various bosses in Silksong! If you're looking for more help, check out Hollow Knight: Silksong walkthrough.
Read this next
- Hollow Knight: Silksong devs admit it has "moments of steep difficulty" but also a "higher level of freedom" to avoid getting stonewalled
- Hollow Knight: Silksong's second patch detailed, but don't expect any balance tweaks
- Hollow Knight: Silksong is reportedly already about a third of the way to the original's total sales, with Steam leading the charge